Gardening from scratch - a beginners guide

A beginners guide to Gardening.

Have added several 5' x 13' plant beds to a garden.  Starting from scratch using only the minimal of tools, a shovel, rake and a home made soil sieve.  Also using kitchen scraps to make a compost heap, along with grass cuttings and any spare soil from different areas of the garden. 

This is where the sod was  taken off and placed in different areas of the garden.  The soil has never been worked, and had to be dug by shovel to turn it over.

next, the soil was dug up and passed through a sieve to aerate it and get rid of any surface weeds.


and the next stage was to add other top soil which had been sitting out for a couple of years, the three types of soil used was the original, which is slightly grey in colour (yellow card) and the compost (green card) and the top soil ( blue card)

The tools used were rudimentary, and because there wasn't any wheel barrow, have used a plastic flower pot instead.  This works quite well, and builds up muscle.the sieve was put onto two upturned containers and worked through with the hands or a garden trowel.  the sieve was made of four pieces of wood and really find wire mesh about 1 cm diameter holes.  The garden centre thought it strange to ask for a 2 foot square piece of wire... but it was cheap and didn't want the whole role. 

The completed garden bed with a loose stone wall and loose brick planters.The total time it took from start to finish was approximately 12-14 hours of work with minimal equipment. This is half way through the process, the three extra beds took two weeks. Two other beds are done and are 13 x 5 as well.  Each bed will be fertilized with kitchen food, and compost from the compost heap at the end of October trenches will be built in each one and food waste will be placed in the shallow trench.  This will be covered once the frosts start freezing the ground and then covered over to break down over the winter.  Once Spring comes the beds will be turned over once more.  With the addition of extra soil in the fall to each bed they will be about 6 inches above ground so any settling will keep the beds at ground level or there abouts rather than sinking into the ground - at least that is the general idea...

Here are the beds half way through...


And here are the finished beds - all material was found on site, the only thing that was bought was the material to stop the weeds from growing up through the gravel.

some trees in the back ground are only a year old, everything seems to grow really fast during the summer months.  We have one tree that grows 6 feet in one year and is notoriously hard to get rid of, its Carraganon, and grows wild here on the prairies.  It's invasive but excellent for fencing, coverage for just about anything else except eating!


The beds are planted on the sides with what ever was found in the garden, the first bed has concrete breeze blocks excellent for using for potted plants as well, the second is made from stones found in the garden, and the third is made from lumps of sod from the beds ithemselves.  These are laid out at an angle and laid on top of the weed sheet and built into an informal wall about 6 to 8 inches high. Over the winter it settled and produced a hard surface along the edge of the bed.

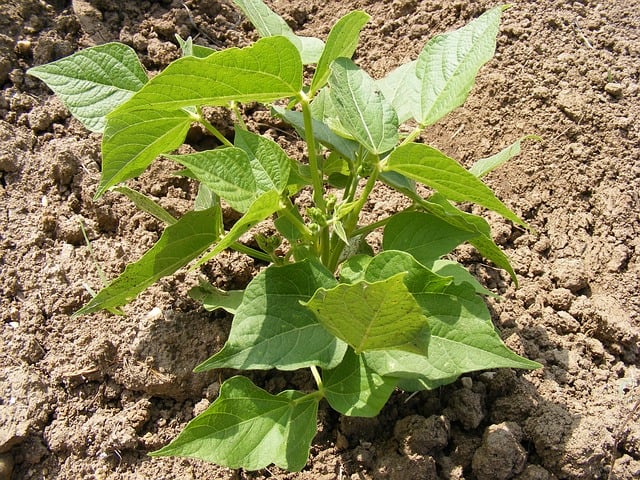
Three extra beds were made and using the same process as above.  The beds have the hoola hoops and tomato cages to put the plastic over them to help prevent the seedlings from dying if the weather changes suddenly.  Branches can also be used.  In the new beds the soil was mixed with potting soil and sieved to reduce the grass, roots and dandelion roots.  Established beds were dug up and airated and left for a week, and then had a fork passed through them to get out the roots from the grass and dandelions.  All beds had kitchen compost dug into a trench in the early fall (September/October) and was buried to break down over the winter, then worked through the soil then left for a week before being raked over and then planted with seed.  As soon as the seeds were planted, took a journal and made a note of where the seeds were in the garden.  (in our area we have a short growing season, normally from May to end of August/September) then it starts to get cold again mid September to October.  After that it's anyone's guess as to when the snow falls!) All seed this year is short term, (maturing between 50 and 60 days.) because of the long winter and not sure of how long the good weather will last... but if there is a possibility, the seed can be planted twice.  Have also planted several types of squash, the leaves and flowers can be used in most cases, especially if it is pumpkin.  (seeds have been used from last year's crop)

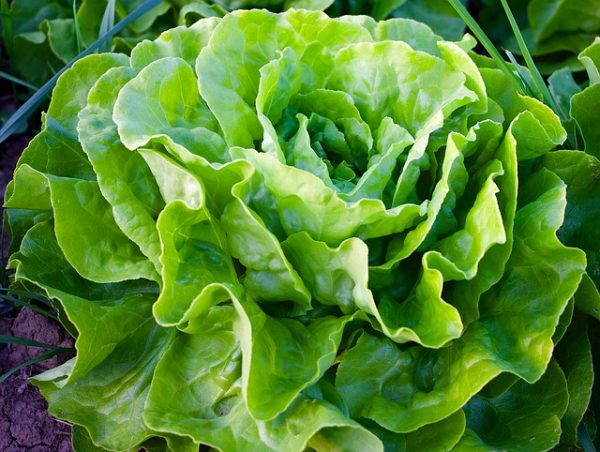
Have also used containers to plant herbs and lettuce and will also be making a raised bed for herbs and other plants.

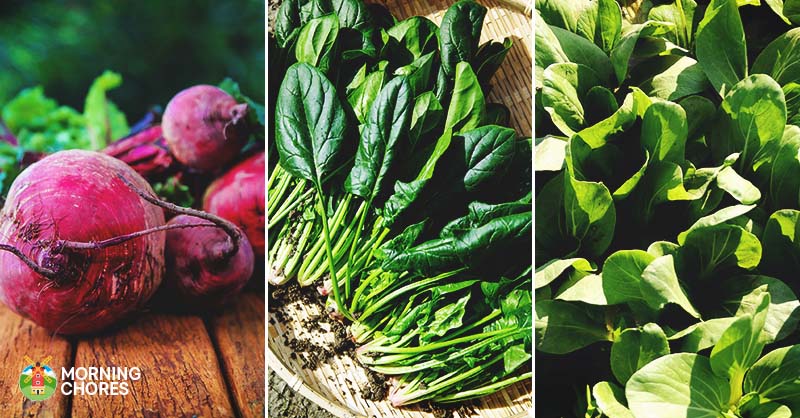
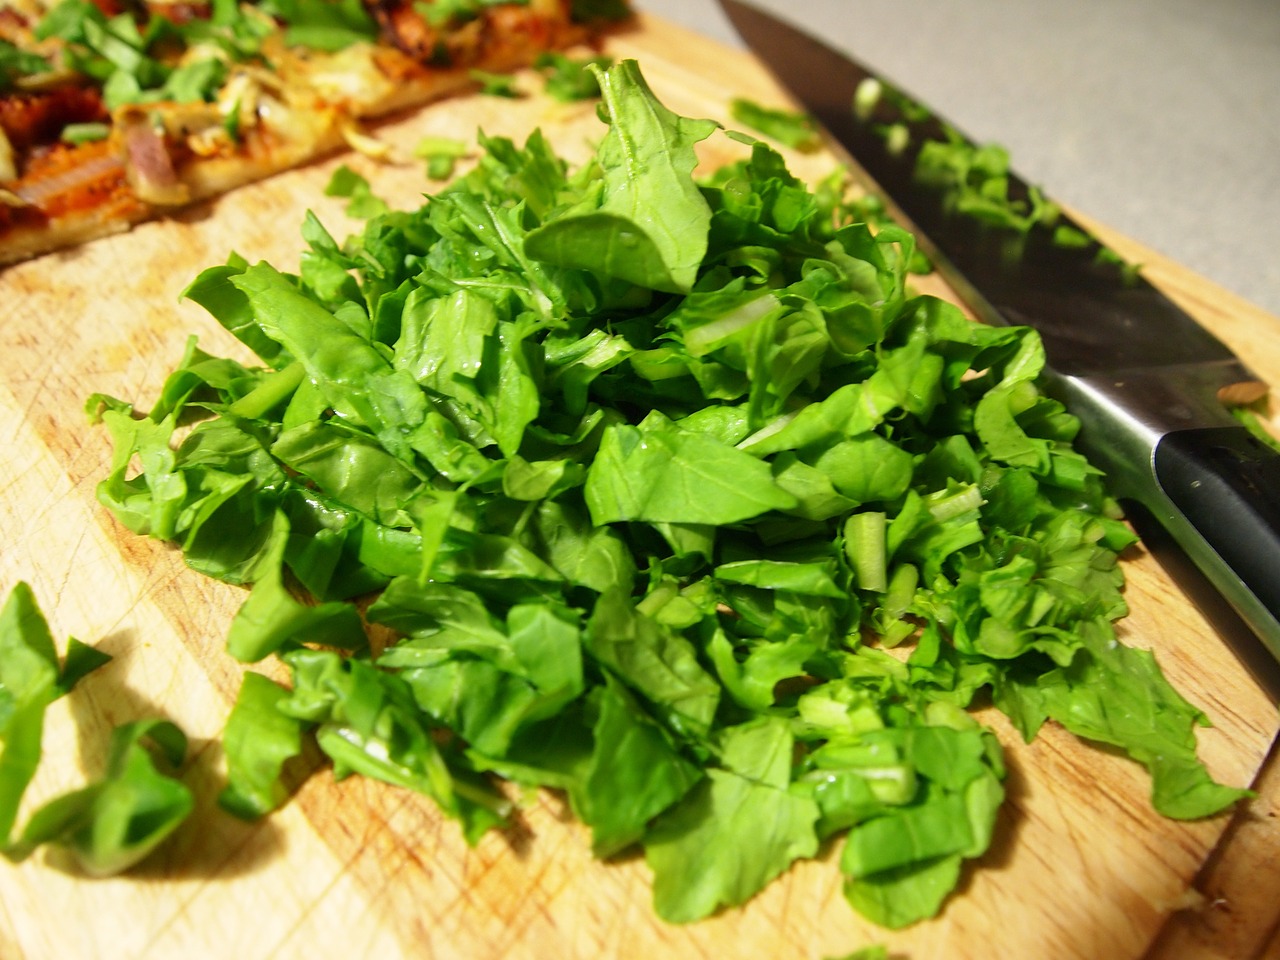
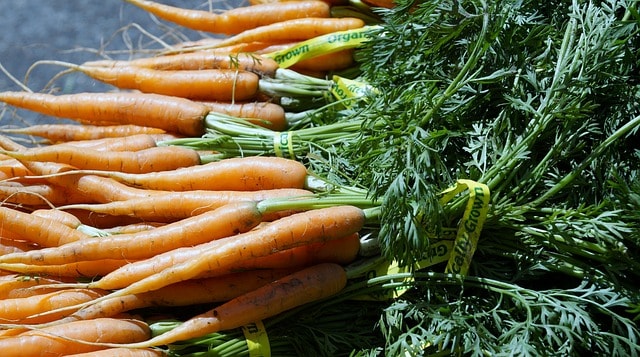
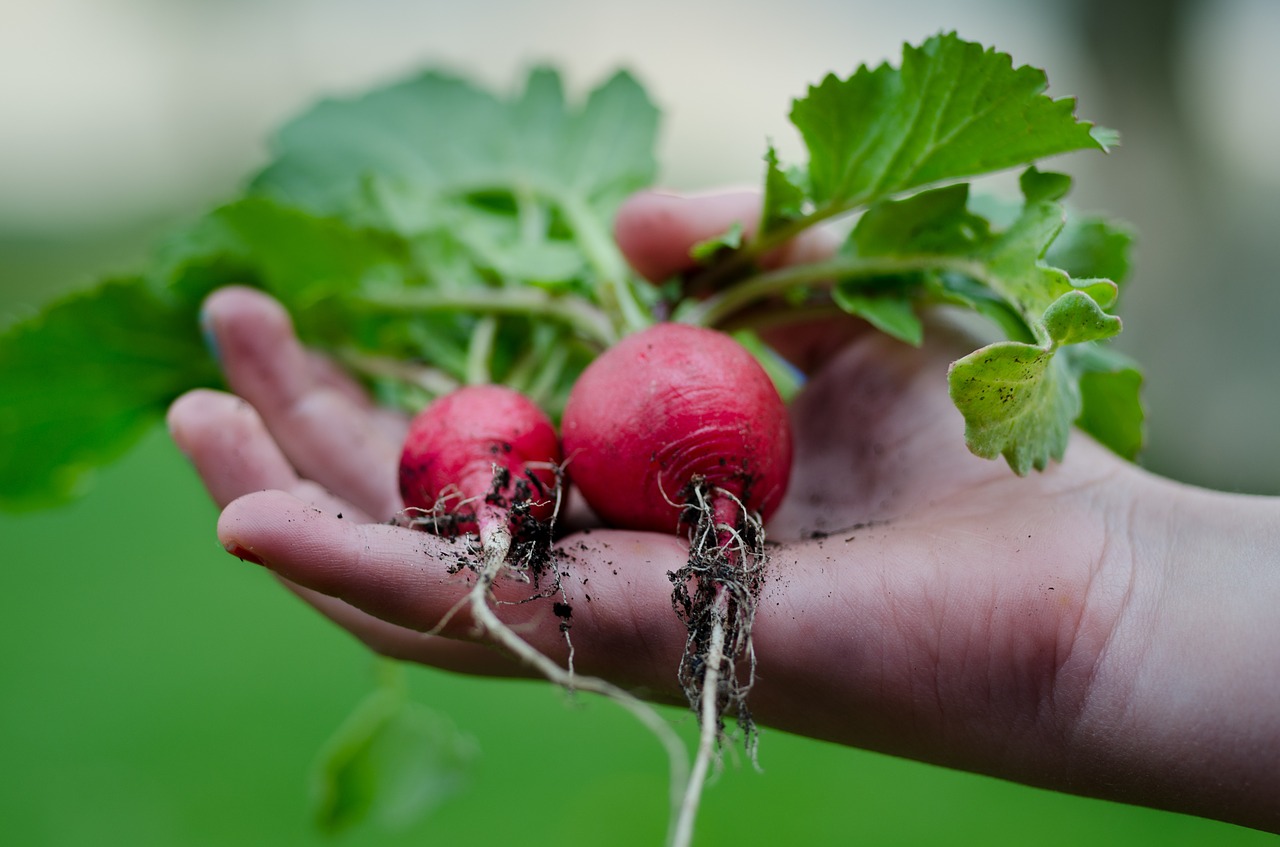
The seedlings are now coming up after 3 weeks, we planted fast growing seeds, raddish, swiss chard (2 different varieites), carrots, spinach and beetroot.  The tops can be used in a variety of ways almost immediately after showing especially the raddish.  They have a spicey peppery taste and good in sandwiches or salads.

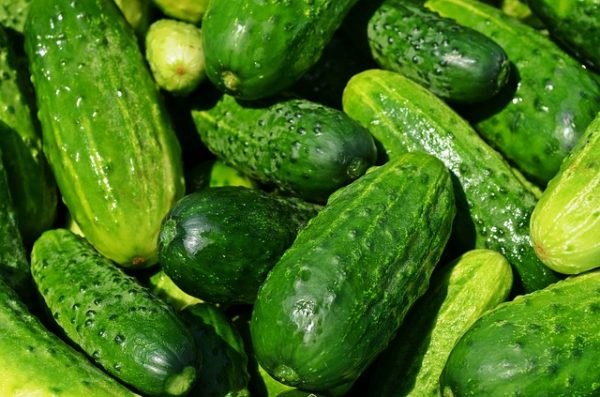
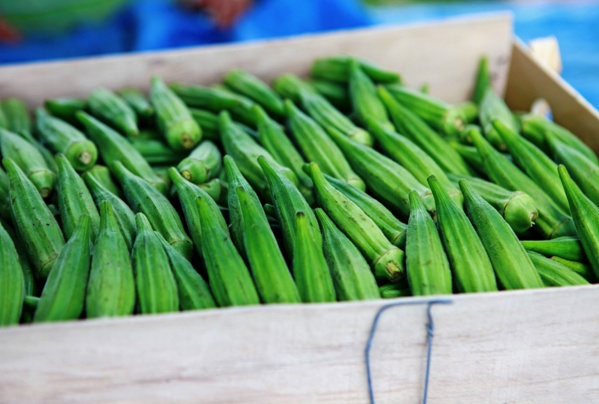
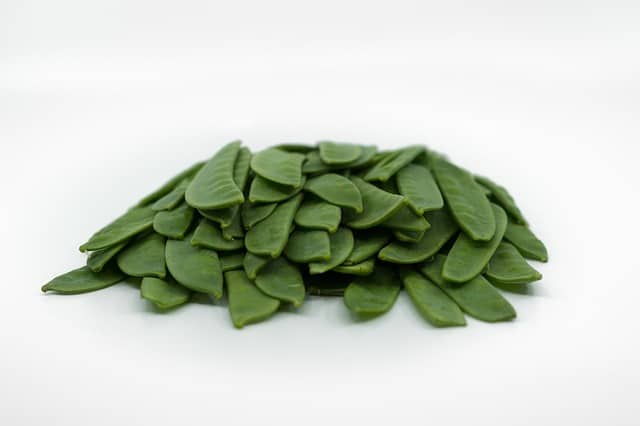
Also added in other beds peas, tomatoes, bok choy, coriandar, several varieties of potatotes and squash.

The compost heap was originally placed at the back of the garden.  It had been added to over 5 years but needs to rest.  It will be turned over this year, if there are no squash growing in it.  So we made a second compost heap using only kitchen scraps no meat as this would attract vermin and it would stink.  We placed the scraps on a piece of dirt that had been cleared of grass.  Then cordoned off to show where the compost needs to stay.  We added soil ontop of kitchen scraps over the winter to help with the breaking down of the food and then when spring started we added more.  We also add grass cuttings.  In previous years we have used the dandelions and spinach for salads.

After two months, the spinach is starting to flower and go to seed.  Will be keeping one row for seed and will harvest the rest.  The spinach when it's starting to flower is still good to eat either raw or cooked Believe the plants with the yellow flowers are swiss chard.  Have kept a garden journal of what seed has been planted in each bed.  But, these came up from last year when it went to seed.

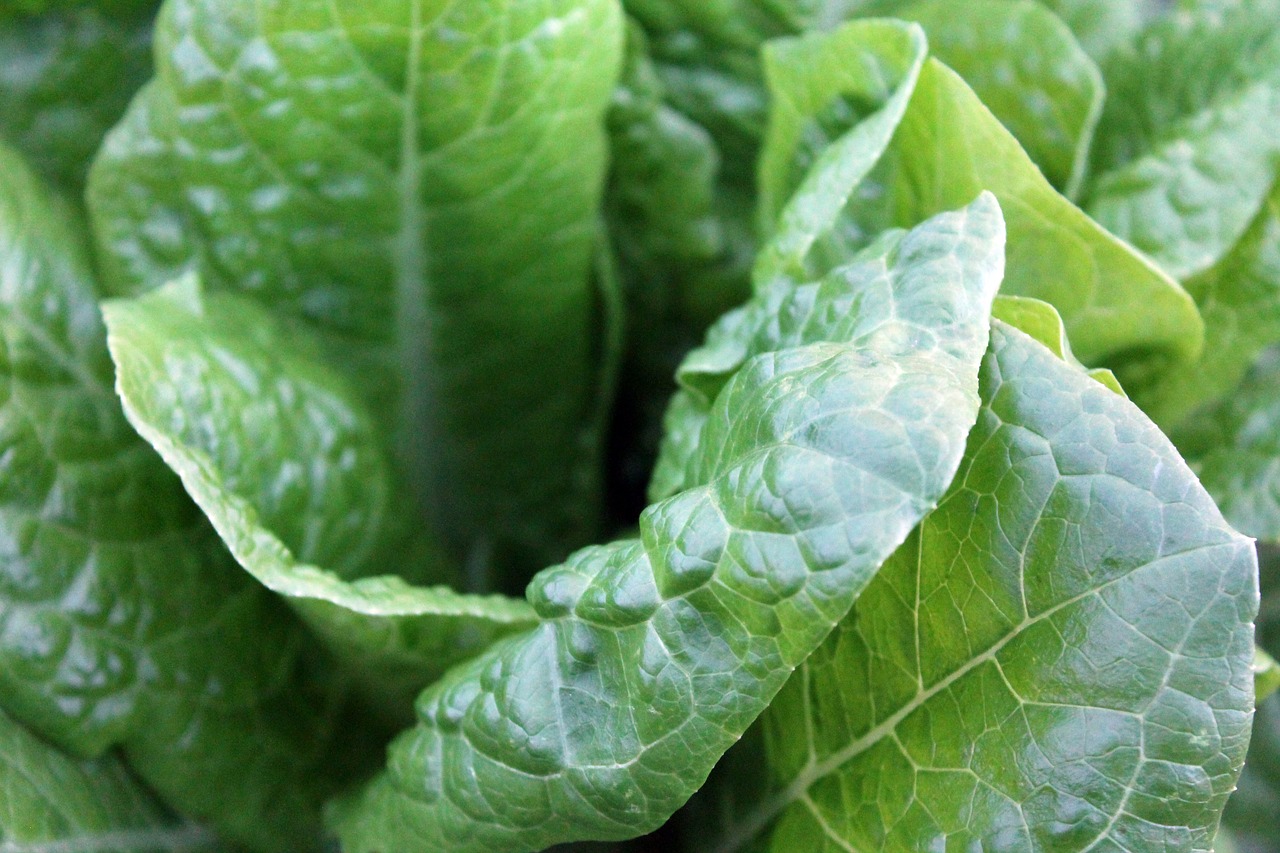
And here is the Spinach...
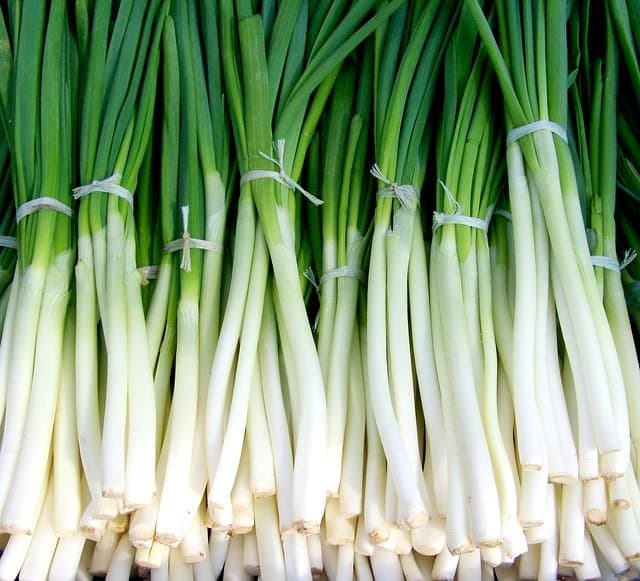
And the chives.

http://www.zetatalk.com/food/tfood142.htm

http://www.zetatalk.com/poleshft/p168.htm

http://www.zetatalk.com/info/tinfo25c.htm

http://www.zetatalk.com/poleshft/p28.htm

Views: 30980

Reply to This

Replies to This Discussion

https://www.thespruce.com/how-to-grow-a-victory-garden-1388679


How to Grow a Victory Garden


Senior man selecting vegetables for harvest in vegetable garden


Victory gardens emerged during World Wars I and II as a way to minimize demand on an overburdened public food system. Citizens were encouraged to grow fruits and vegetables so that more of the foods coming from farms and processors could be shipped overseas to soldiers.

Victory gardens are once again becoming popular. But this time, the goal is different. The new victory garden is all about self-reliance. It's about growing your own food so that you have control over how it is grown and how much you pay for it. It's about getting back to real food.

Are you ready to plant a victory garden for you and your family? Here's a list of what you need and the steps to follow to plan your victory garden.


What You Need for a Victory Garden

  • A space to garden
  • Plants or seeds
  • Tools: hoe, trowel, gardening gloves, watering can

1. Decide Where You'll Plant Your Garden

A sunny patch in the backyard is an obvious choice, but it's not the only option. Window boxes, containers, and even rooftops can be utilized with great success. Are you short on space? Consider working edibles in around your existing flowers and shrubs.

Are you stuck with a shady backyard? Then, think about planting your victory garden in the front yard. Many fruit and vegetable plants are actually quite attractive, so there's no need to give up curb appeal. Front yard gardens and gardens in the parking strip are becoming common in some neighborhoods. If they aren't yet sprouting up your neighborhood, you could start the trend.

No space to garden? See if there are any community gardens in your town, or ask a friend if you can garden on their land in exchange for a cut of the harvest.


2. Determine Your Zone

The USDA Hardiness Zone is a guide for what will grow in different areas. You will find the zone listed on seeds, seedlings and plants. Once you know your zone, this will allow you to choose plants that are suited to your specific growing conditions and increase your chance of success.


3. Pick Your Plants

Focus on the fruits, vegetables, and herbs that you eat regularly to make the biggest impact on your grocery bill. Are you new to gardening? Then, start with plants that are easy to grow. Do you like to keep things low-maintenance? Then, include lots of perennial foods, and you'll have less to plant next year. See if your local garden center, community college or county extension agency has classes for beginning gardeners.


4. Shop for Supplies

Catalog companies are usually the cheapest source for seeds and plants. Place your order early, and they'll ship everything out when it's time to get things in the ground. If you need soil amendments, those are likely to be best purchased locally to save on shipping.


5. Study Up

While you're waiting for spring to arrive, pick up some gardening books from the library, and learn everything you can about gardening. Check to see if there is a Master Gardener program in your area and how you can consult with one. Ask at your local garden centers about classes, seminars, and people you can talk to about starting a garden.

Fast Growing Vegetables


16 Fast Growing Vegetables That Will Give You a Harvest Quickly


Would you like to grow a vegetable garden but feel like it just takes way too long? Well, the amazing thing is, it doesn’t have to.

Instead, you can plant some faster-growing veggies and have some great fresh food options to choose from.

So if this sounds great to you, then you’ll want to stay tuned to this post.


16 Fast Growing Vegetables:

Here are the faster vegetable options that you can grow in your garden:

1. Arugula


Arugula

Arugula is a wonderful little green that has a peppery flavor to it. We grew it at our old homestead. It was a delicious addition to our perennial garden.

If you’d like to have a peppery green to toss in your salad, then you should consider growing this flavorful vegetable. All you’ll need to do is plant it, give it about a month to produce mature leaves, and then cut them when you’re ready to enjoy.

Then they’ll continue to grow back each year for your enjoyment.

Arugula can be grown annually in nearly all zones and can be harvested after 30 days.

2. Spinach


Spinach

Spinach was one of the first things I ever tried growing. I did so because of how fast it grew and how simple it was to grow.

Basically, you directly sow the seeds into good quality dirt. Then you’ll need to water and wait. Before you know it, in about 4-6 weeks, you’ll have fresh spinach.

Spinach can be a nice addition to any salad, or you could prepare the spinach fresh like in this recipe.

Spinach can be grown in Zones 3-9, and the leaves can already be harvested 6 weeks after planting.

3. Baby Carrots


baby carrots

Baby carrots taste delicious, are a great snack, are great to cook with, and don’t take as long as full-sized carrots because they don’t have to grow to be as large.

So if you enjoy carrots and want them quickly, then you’ll definitely want to pick the baby carrot variety. Plant them in the ground, or in a container garden for versatility.

Either way, be sure to directly sow the seeds in quality dirt. Then in about 30 days, you’ll have your first harvest.

Baby carrots can be grown in zones 4-10 and can be ready within a month from sowing.

4. Radishes


Radish

Radishes are probably one of the fastest plants you can grow. They are also super simple to grow as well.

If you’d like to try and grow your own vegetables, radishes are excellent fast-growing vegetables to start with. You’ll directly sow these seeds in quality soil.

Radishes can be harvested in about 22-50 days and can be grown in zones 2-10.

5. Cucumbers

Cucumbers

Cucumbers are a very versatile plant to grow. You can make lots of delicious recipes with them. You can start with eating them fresh.

Then they could be a great addition to a salad. When you are “cucumbered out”, you can start making pickles with the fresh cucumbers.

But be advised that cucumbers like to run so you’ll need to either place them on a trellis or give them plenty of space to grow.

Cucumbers can be grown in zones 4-11 and if you want to make pickles the baby cucumbers can be harvested as early as 50 days after planting.

6. Beets

Beets

Beets are one of those vegetables that you either like or you don’t. But even if you don’t like the actual beet itself, you may enjoy the greens that come from the plant.

So either way, it is a great vegetable to grow if you’d like to have a harvest in a hurry. It is good to grow in the spring or when we are heading into fall because they can withstand a little heat, but don’t like the super-hot temperatures we often experience during summer.

Beets can be harvested in around 50 days, however, the greens can be harvested from 30 days. They grow well in zones 2-10.

7. Bush Beans


bush beans

Bush beans are my favorite kind of bean. They grow beautifully in the garden, they are easier to prepare when canning green beans, and they also produce a quicker harvest.

So if you love tender green beans, then consider planting a bush bean variety. All you’ll need to do is directly sow the seeds into quality dirt.

Then over time, with water and sunlight, they will produce a beautiful green bean bush.

Bush beans will be ready in around 40-65 days and grow well in zones 3-10.

8. Bok Choy


Bok Choy

Bok Choy is a fun plant. It looks fun, and it is even fun to say its name.

But it is also a great plant to grow because it can produce a mature harvest in around 30 days. If that isn’t a super-fast plant, I’m not sure what is.

If you are looking for something different to grow that will produce a fast harvest, then you should definitely consider Bok Choy.

Bok Choy grows well in zones 4-7 and individual leaves can be harvested after 21 days, or the whole head 45-60 days after planting.

9. Lettuce

Lettuce

Lettuce is such a versatile plant. There are so many different varieties to choose from that you can have a different flavor and crunch with each one.

But the great thing about lettuce is that it is hearty so it can grow in colder temperatures, and it also doesn’t take very long to produce a mature harvest.

If you want something healthy, green, and fast, then you should definitely consider planting lettuce.

Depending on the Lettuce variety, harvest can be about 30-60 days after planting, ideally in zones 4-9.

10. Summer Squash – Zucchini

zucchini-squash

Summer squash is probably one of my favorite vegetables to enjoy during the warmer months. It tastes delicious, is easy to grow, and produces quickly too.

So if you need to learn how to grow your own squash, here is a great resource to help you along the way.

But a quick overview is basically, you directly sow the seeds in quality soil, water them, and wait for them to grow and produce.

However, you’ll want to be sure to harvest your squash or zucchini when they are young for better flavor.

Zucchini, a Summer Squash variety, grows best in zones 3-10 and can be harvested almost daily from day 35 onwards as they grow so quickly.

11. Okra

Okra

Okra is another favorite vegetable of mine. It only takes about 50 days to produce a mature harvest.

Then you are clear to pick it and fry it up into a delicious side dish that many enjoy.

But you can also prepare okra in other ways as well. Go ahead and enjoy this fast-growing vegetable. You’ll be glad you tried it!

Okra can be planted in zones 3-9 and the Cajun Delight variety matures in 50-55 days after planting.

12. Kale/ Greens


Kale

I am a huge fan of greens and kale, but it has not always been that way. In fact, growing up, I wouldn’t touch them with a ten-foot pole.

But I’ve learned it is all in the preparation. I think I also love them even more now because I try to grow most of my family’s food.

And who doesn’t love a vegetable that is fast to produce? You can pick baby greens from kale or mustard greens in only 25 days.

Then you can have your mature leaves in about 50-65 days.

Kale does well in cold and can be grown in zones 8-10 all year round, but can also be planted in zone 7.

13. Snow Peas


snow-pea

Peas have always been interesting to grow to me. In my experience, you have to plant a lot of them to get a decent harvest.

Now, for me when I say decent, I mean enough to eat and preserve.

But if you just like to plant something to eat on it, then this could still be a good option for you. Snow peas take around 10 days to complete the germination process.

Snow peas can be harvested at around 60 days. They do well in zones 3-11.

14. Broccoli


Broccoli

I love broccoli. As a kid, it fascinated me because it looked like tiny trees. As an adult, I love it because I can put cheese on it, butter on it, or seasonings and enjoy it again and again.

But as someone that tries to produce most of their own food, I love broccoli because it likes colder weather. It is refreshing to be able to grow something green when the temperatures are still nippy outside.

So if you love broccoli too, then know that you can grow it and have it ready for harvest in around 60 days. That is how long it takes for it to make mature heads.

However, you could enjoy smaller heads of broccoli even sooner than that. It is all about your preference.

Grown in zones 3-10, Broccoli can be harvested after day 58, depending on the variety.

15. Green Onions


Green onions

Green onions are another really versatile plant. You plant onions as bulbs. The bulbs take around 6 months to produce full-size onions.

But you can get green onion stalks at around 3-4 weeks. They taste delicious as a garnish for soups or to be added to stir-fry as well.

So if you want something green, fresh, and packed with onion flavor, then know that you can have all of that in less than a month.

Green onions grow in zones 3-9 and can be ready in 20-30 days from planting.

16. Turnips


Turnips

Last but not least, Turnips are another vegetable that is amazing because you get two products in one plant. Turnips produce a bulb that has a very unique flavor.

In my experience, you either love them or you don’t. My mother-in-law absolutely loved them. She’d eat them every meal if she could.

Whereas my husband and children won’t go anywhere near them.

So you’ll need to try them for yourself to see which category you’ll fall into.

But whether you like the actual turnips or not, they produce some amazing greens. I love turnip greens. You can boil them, pour off the first boil, then boil them again. This takes away some of their bitterness.

Then you cook them with some bacon, onions, crushed red pepper, salt, and pepper. You’ll have one amazing side dish.

So if this sounds good, then know that you can have turnip greens in 40 days and turnip roots in around 60 days.

Turnip varieties such as the Market Express can be ready in as little as 30 days, and Turnips do well in zones 3-9.

Now you have 16 different fast-growing vegetables to start your garden with. They can be grown at different times of the year which means you can have a fast harvest almost year-round.

So hopefully, this will encourage you to produce some of your own food now that you know it doesn’t have to take an eternity to be able to harvest your vegetables.

https://morningchores.com/fast-growing-vegetables/?fbclid=IwAR3JBmf...

This year we decided to make use of the trampoline pit and use it for planting.  We wanted to make it in such a way that it was also a below ground raised bed.  A ramp was made into the pit and a three foot deep by five feet in length walk way that has access to all parts of the bed from the centre. This will help with the disability.  We went through different scenarios, to build up the bed and buy the soil  to fill it in, or to incorporate what we had and dig into the pit.  We will also be lining the base and the sides with plastic to prevent the soil from falling through the chicken wire.  

We also wanted to do this year a square foot gardening.  This space will provide a bit of a challenge, but we feel is doable. We have small stakes in the bed to tie the string to make the square foot markers.  First we put down saved tea leaves, crushed egg shells and epsom salts.  The tea leaves and egg shells we saved over the winter.  It's not warm enough to plant seeds as yet we will be planting mid - to late May.  

It has been a cool spring here 52 degrees north.  We did get a few nights of frost and several days where the temperature struggled to get to double digits in mid-May.  We decided to hold off planting anything until the end of May/beginning of June to be on the safe side.  The wobble becoming more erratic and the weather is making it difficult to gauge what to plant and when.  So we left it until later in the season. 

We don't consider ourselves seasoned gardeners but the blog is about gardening for the absolute beginner. Those who have never gardened before and are looking for pointers to help with planting or starting a garden.  

This year we decided to do three different kinds of garden, a raised brick bed, container garden and ground level garden.  The ground level garden is such that it allows access to both sides, the outside and the inside for someone who is disabled.  The container garden and the raised brick bed allow for the same - access for someone with disabilities.  

This year we decided to go with a mix of starting the garden with seed and nursery bought plants.  We planted peas, beans, carrots, beets, kale, squash of several kinds, herbs, tomatoes, potatoes, peppers and corn.  We bought the corn from a nursery, as we have not been in recent years, successful in growing from seed.  

We have strawberries, raspberries which were cut back severely, grapes, rhubarb and crab apples which remain a feature in the garden year after year.  

This year we decided to plant some of the herbs, kale, peppers and swiss chard in pots and put them around or up on a table for easier access. We used soil bought this year, but, it was very hard to find.  Lots of people are planting a garden this year. When planting in pots we clean out the old soil and put that onto the compost heap or onto a different bed.  Next we put into the bottom to cover the holes to help with drainage, old crockery.  In this picture, we've got an old pot that has cracked and have put a piece of cardboard to help support the opening.   We then put soil in the bottom, 3/4 of the way up and let it settle for a few hours, soaking it with water.  Then add the plants where we want them to go, add more soil around the roots, and water well. 

We cheated and bought these plants from the nursery.  

The brick bed which was built last year, survived the winter.  This year we left the leaves from the fall on the top of the bed.  We decided to plant herbs into the two beds.  Along with spinach, borage, swiss chard and kale we also planted lady's fingers or Ocra.  Most of the herbs we got from the nursery, and others are seed like the borage, kale celery and swiss chard.  The spinach is self seeding as is the borage but we added more seed.

We 'sprinkled' the seeds around the beds and added a light layer of soil over the top and watered well for several days.  

The brick bed is under some trees and gets sunlight for the majority of the day, but is protected from too much rain or hail by the trees.   

The chair spokes are to help with digging holes, and where we put seed. 

We dug our trampoline pit this year to make it a more viable garden.  This year we are trying square foot gardening - and we are looking forward to trying something new.  With help we were able to mark off 'squares of a sort in a horse shoe shape, and add seed and nursery bought plants. 

We were not able to start seed inside, as the utility room we have is not heated, and we don't have enough room.  We planted mid-May - which meant a lot of cold nights still but the plants survived and the seeds, broad beans, peas, corn, squash of several kinds including giant squash, pumpkin, butternut, cucumber and summer squash have been planted.  Included is also carrots, beets, spinach and tomatoes, which are not liking the weather as we normally plant them in the tires, and this year we are not using the tires for planting. 

We planted red cabbage and cauliflowers, much to our surprise they seem to be doing really well! These here are about 3 weeks old planted from plants bought from the nursery. 

Several different kinds of squash have also been planted and these are underneath the old trampoline frame so they can be encouraged to grow upwards.  


We also bought corn from the nursery.  We have been unsuccessful from seed, either the seed was not good, or not in the right area of the garden.  The corn here is in the middle of the garden and will get full sun and is easily accessed to water.   

Coming up this year again are the sunflowers, borage and spinach and we scattered dill seed everywhere.  We have also let the garden get a little wild this year to encourage the bees into the garden.  We did see a few wasps hovering around various places, and to discourage them we found a cheap paper wasp nest version from a dollar store nearby and hung it up.  So far no wasps!  We found out a few years ago, if there are wasps in the garden, bees won't come into the garden.  

This year we also decided to plant nursery bought swiss chard, kale and peppers in pots to see how they do, but also provide easier access because of the disability. This will be placed on a higher surface. 

The swiss chard in containers will be interesting to see how well they grow compared to the ones in the ground. 

We also planted the kale and peppers in a container. 


This year we decided to do a square foot garden, and wanted to show how easy it is for beginner gardeners to venture into different projects.  Keeping the garden simple and having a plan, either on paper or generally understanding what it is that's needed, we find - makes it easier.  Even if as a beginner gardener a person doesn't need a whole lot of vegetables or herbs to throw into the ground or into containers.  Gardening can get overwhelming when first starting out.  When someone asked what a beginner gardener can plant, the suggestion was to stick to 5 main vegetables/crops.  These 5 crops are easiest to grow because they mature quickly and most of the plant can be used except for the beans.  We didn't include the potato, as it takes too long to mature and doesn't do well in dry or wet conditions and can't be eaten when young as the tubors are green. 

Squash - the whole plant can be eaten, except the roots.  A very versatile plant, and once established it will grow to either climb up a trellis when trained, or on the ground.  To have healthy squash plants, allow them to breath, like a person with too much clothing the skin can't breath, just like with squash they need to breath!  Trimming the leaves at the bottom, to allow air movement and trellising the squash will help.  If the leaves turn brown or have a white dusty substance (mould) take them out so other leaves don't get infected.  It also means the squash isn't getting the air circulation it needs.  Squash can grow in full sun or semi shade and needs to be watered well. collecting the seed from the squash - allow the squash to mature on the vine, and then take it off and store in a cool dry place! When ready to use the squash take out the seeds, wash off the slimy insides, and allow to dry and then plant when ready the following year. 

Beetroot - another versatile vegetable, can easily be planted any where in the garden, can tolerate shade, weeds around it and full sun.  Beetroot can be planted either close together, although the roots will not be able to spread as much not produce the bulbous root we are used to seeing, but is still edible, so it's good for small spaces like that.  Or, beets can be planted in a row, or in what ever way is available to the gardener at the time of planting.  This year we planted in our square garden and put 6 holes in our square foot and two seeds in each hole.  The whole plant is edible, and the leaves can be harvested through out the growing season.  Since we are 52 degrees north here we harvest the leaves of the beetroot up until the first frosts, and then we can dig them up a little later as the ground isn't yet frozen.  Water well up until the first frost, and the beetroot can be left in the ground until later in the season or until it starts to get freeze.  If wanting seeds from the beetroot, don't trim the leaves - leave them and allow the plant chosen to grow - the beetroot will produce seeds in the fall, and can be left over the winter even in the most severe of cold, and can harvested at that time or later the following spring. 

Carrots - Like beetroots, the whole plant is edible! although the greens when older on the carrot can be bitter, the young leaves taste sweet and go well in salads and stews.  This vegetable is very versatile,  and can be grown in the shade or full sun, but doesn't do well with lots of weeds around it, as the weeds or grass tend to grow through the carrot roots.  When planting, either in a row or in individual holes with a couple of seeds, thin out as necessary, as the carrots may not grow fully.  Carrots can be left in the ground over the winter and harvested in the spring especially here at 52 degrees north, and make a nice surprise fresh addition to any dish.  To get seed from a carrot, we have used organic carrots from the store, put them into the ground and let them grow.  They can be left over the winter and harvest the seed in the spring!

Spinach -  Another versatile plant.  The whole plant is edible when young, when mature the leaves are edible, but not the stalk as it matures it becomes fibrous so it's easier to cook when the plant is young.  Water well all season. If wanting seed, allow the plant to mature and it will produce a lot of seed - these are not edible.  Collect in the fall as the plant dries up.  We have planted in previous years in rows or in an organized fashion, but this year we scattered the seeds around the place.  Spinach grows just about anywhere and will grow in full sun, shade or in weeds.  

Peas - Another versatile plant, they introduce nitrogen to the soil and when young the leaves an be eaten as well as the pea pods.  When the pea pods are mature they have the seed inside them and the peas can be eaten fresh, or cooked.  Peas like full sun and plenty of water and can grow with other plants like sunflowers so the vines trellis up to keep the pods off the ground.  To collect the seed, wait for the plant to mature and dry out and then harvest the peas in the pods in the fall for the following year.  

All seeds have a shelf life, and to allow a longer shelf life, keep in a cool dry place out of the direct sun!

Herbs

Borage - The whole plant is edible when young, as the plant matures the leaves can be eaten like spinach and the flowers make a colourful addition to any dish or drink.  As the plant matures they produce a seed that can be collected in the fall. 

Cilantro - the whole plant is edible including the top part of the root.  Produces all season long and can grow anywhere in the garden.  When collecting seed, (coriander) allow the plant to mature and dry, this seed is also a spice and can be used in cooking.  When grown fresh it does have a stronger flavour than shop bought coriander.

Chives - Most of the plant is edible, the green stalks that are flexible make good eating, raw or cooked in several dishes.  The stalks with the flowers on are fibrous and don't make good eating.  To collect the seed, allow the chive flower which is purple, to dry out and take the stalk and hang upside down for the winter.

All three of these herb seeds can be scattered around the garden as needed and will grow in just about any place and in any condition, full sun, shade, or a weedy garden. Water well.  The chive plant once established will do well in any condition and does well in drought or dry beds.  

Here we are in another year, and a different plan for the garden!  Last year was a bit rough, so family members have taken to doing the garden this year.  Keeping it simple and to the point.  We decided to build another raised bed from pallets and fill that with garden debris, straw and soil.  We will be finishing off the seat with lumber as the pallets are not big enough.

We also built what we have been calling a Pizza bed for the potatoes.  We layered over the old bed which is a west facing bed, garden debris from the previous year, stuff like twigs, vines from the squash, and stalks from the sunflowers.  Next we put compost on, mainly kitchen waste.  We didn't cut it up or anything - just put it onto the garden debris.  Next we put the old soil from the containers onto the kitchen waste, then a layer of leaves and some more soil.  We let this settle for a week, then put more soil on top added a layer of straw and a good chunk of soil on top.  All of the above we were very generous with each layer, so by the time it came to planting the potatoes, the bed was at least 2 feet higher off the ground and rounded.  

The potatoes we planted were from last year's harvest and some organic potatoes from the store that sprouted.  We kept them in the kitchen away from the vent, but in a grass basket in the dark.  We put apples with them to prevent them wildly sprouting in the spring.  And so like pepperoni on a pizza we put the potatoes onto the bed with straw on top and topped them with soil to cover.  When they sprout through the soil we will put more soil on top. 

We decided to try out this method to maximize a small space and to show that a garden doesn't need to have a huge space for potatoes to grow.  If they can be grown in a container they can also be grown in a raised bed! (Picture on the left)

We also put a few potatoes on the ground, covered them with straw and soil.  We  will layer the soil on top of them as the potatoes grow. (Picture on the bottom right)

On the left is the finished bed with the potatoes covered in straw and soil.  


We've had some rain here at 52 degrees north, but it is still dry.  Our garden is doing well after only a month of being in the ground.  The potatoes are coming up and we've hilled them, by adding soil to the bed we made for them.  The straw has helped with moisture retention and helping to cover up during some of the colder nights earlier in mid-late May. We have had some very warm weather to help the plants along the way.  In this potato bed we planted sunflowers (volunteers) and borage around the edges.  The grass has grown exceptionally fast in the last month and won't be cut until the herbs, potatoes and sunflowers have come through.

The old trampoline pit which was turned into a bed a couple of years ago, has been flourishing with beets, sunflowers, dill, onions, various types of greens, and volunteer spinach.  The spinach is by the thicker grass which will not be cut at this time to allow the spinach to grow.  Since we have cats and they are attracted to the dirt to either dig in or roll around, there will be some areas in this bed that won't be coming up.  This year to prevent too much damage we put down cayenne pepper to stop the cats and others from digging in the dirt.  We had to be careful to choose a day that wasn't windy which can be difficult in May.  

In both raised beds the seeds have sprouted with amazing growth! In the brick bed we planted greens, carrots, beetroot, radishes some herbs.  The containers have herbs in them, and we were concerned as they were placed outside, we have no green house at the moment, but the hot weather at the beginning of June, helped the seeds and we now have thyme, coriander, borage, basil and rosemary. We also planted peas in two containers instead of the beds.  

Our newest raised bed made from pallets, is doing very well!  On one side are beans, at the back leading to the other side, corn and the other part of the bed, spaghetti squash!  

It has been a very hot summer here at 52 degrees north.  We have had little rain as well, but plenty of smoke from the fires around us.  So it has been a mixed bag.  Our plants are doing well, we've been frantically watering them, and realized the plants in the shade are doing a lot better than the ones in the open.  

We will go around the garden describing each bed and hopefully add photos for later!

We don't have anything on our deck except two sleeping cats! we kept it clear this year because of the ramp.  At the bottom of the ramp on the left hand side, we had earlier in the year put some compost down, as well as some old dried out squash and scattered the very dry mouldered seeds.  Around the beginning of July, we cleared the area and the seeds started sprouting.  We found ourselves with Potatoes, Tomato and Squash plants growing rapidly in the heat.  

The Lasagna bed, we put the potatoes in, has been successful so far, and the potatoes seem to be thriving.  We will do an exploratory dig in a week or two to see where the growth of the potatoes are and start harvesting.  

The Brick bed is placed under a tree, and sheltered from the heat of the sun.  In this bed we put Beets, Carrots, Borage, Cilantro, Collard Green, Swiss Chard and Mustard Greens.  The heat, we feel has stunted some of the growth, but these types of plants grow well into the fall and can be harvest long after the first frost.

Our Horseshoe bed, which used to be where the built in trampoline was, has not been a success.  With full access to the sun and heat, the only things growing are the Swiss Chard, carrots and Onions.  The Spinach, Beets and other herbs such as the Dill and Cilantro we planted have not done well.  Sunflowers however, have thrived and taken over the bed.  They provided some shade.  However, surprisingly the shop bought and dried out green onions we planted in the garden from the bottom of the fridge draw have done surprisingly well and are now producing seed!

We have a small seating area and decided to put containers there instead of on the deck.  In our containers we have Lettuce, Peas, Beans, Mint, Nasturtiums, Marigolds, Carrots and our house plants the Spider plant.  The Spider plant died back, but has made a great recovery, obviously loving the direct sun and heat!  In fact all the plants in the containers seem to love the sun and the heat and are doing very well!

The Wooden Raised bed, was made just this year with seating and is already attracting wasps!  But is a great addition to the garden.  We planted Beans, Corn and Squash.  This bed is mostly in the shade except for the first part of the morning.  We have a large tree that casts a large piece of shade in the afternoon.  All three plants are doing very well indeed.  

We also managed to get some nettle root from nearby, and we planted it in a small area by the raspberries, which are not doing so well as they are in direct sun and heat.  We watered them but still not a good crop this year.  The nettle did die back, but with lots of water, it has grown quite a bit.  With nettles we find we have to be careful as they do proliferate, but are looking forward to harvesting the leaves next year!

Reply to Discussion

RSS

SEARCH PS Ning or Zetatalk

 
Search:

This free script provided by
JavaScript Kit

Donate

Donate to support Pole Shift ning costs. Thank you!

© 2024   Created by 0nin2migqvl32.   Powered by

Badges  |  Report an Issue  |  Terms of Service